Here is the second and final part of my Tateya musubi tutorial. Let´s continue:


take the other Koshihimo and then through the back side


bind the strings together


the same on the right side


tighten the Koshihimo strings


put the loose strings like shown in the picture


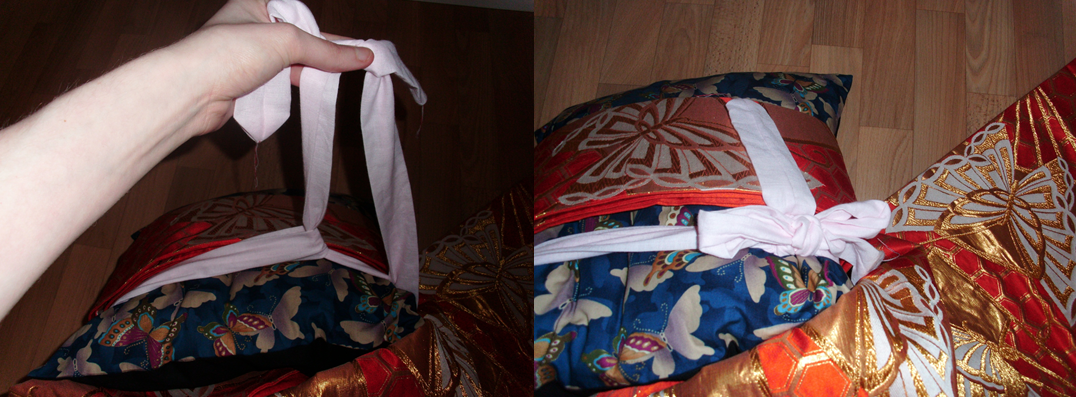
Of course you also have to tie the Obimakura on the front side:


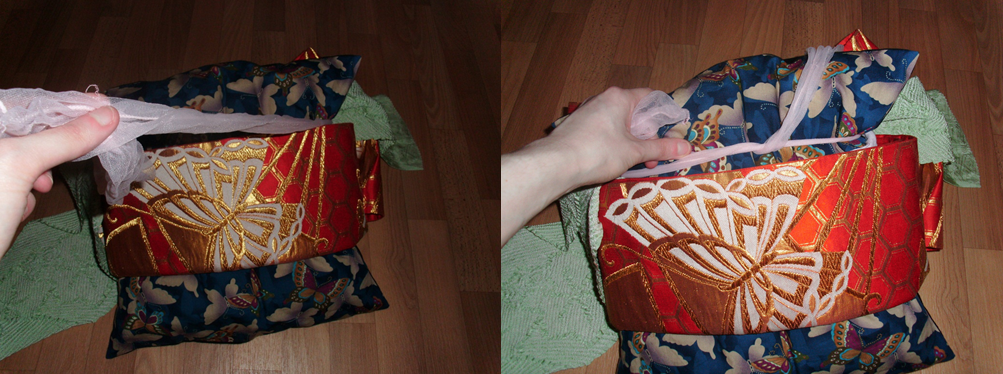
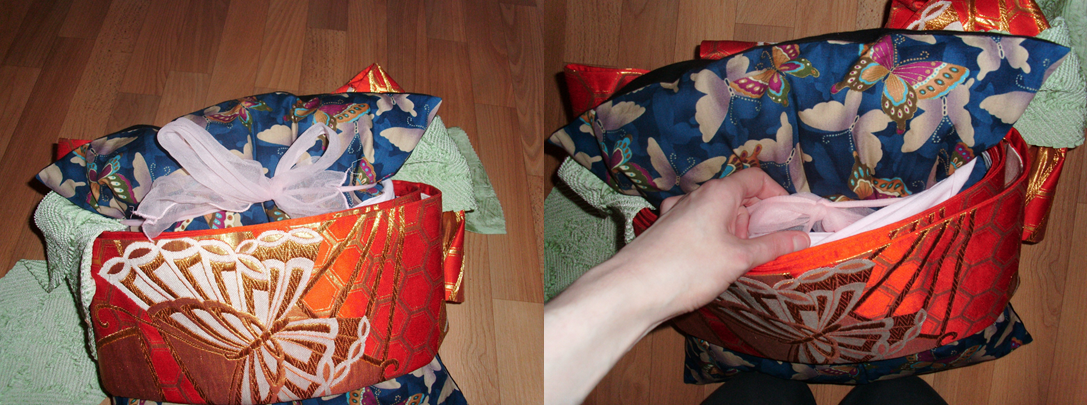
after the tying, put the ribbon behind the Obi layers


the Obiage can stay like this for a while. We will tie it correctly later.


now all is tighten =D


take the small folded part from above over the middle part,
then take your Obijime ...


now make a fold like shown in the picture,
then the Obijime through the folded part


the Obijime strings around to the front part ...


let´s tie the Objime: make a loop on the right side,
then the left string through the loop


then under ... and the string through the left small loop


and after that you have this knot =D


one string under, one up ... done!


Let´s go on with the Obiage tying: fold 1/3 on both sides


then fold it in half, the same on the other side ...


just make a knot, take the red marked part ...


make a loop with the red part, two fingers inside the loop


the blue marked part through the red marked loop


then tighten ... the small ends behind the obi layers ...


... now all is done! =D

Sorry again for my bad English description, but I hope the pictures will help you.

After my introduction here comes the first part of the actual tutorial! First of all I want to let you know that I had to use a pillow because there was no one who wanted to be my *test object*.

Well, let´s start with the things you will need to tie the Tateya musubi - 立て矢結び (standing arrow knot) :


1: Fukuro Obi (here I used a Rokutsuu fukuro obi)
2: Obi makura
3: Obi ita /Mae ita
4: Obiage
5: Obijime
6: 2 Koshihimo


Put the Obi ita around your waist


fold ca. 70 % of your Obi 50/50


the open part has to be on the right side


on the back side it has to look like this


then start to wrap the Obi around your waist 2 or 3 times ...


... until you only can see the patterned part of the Obi on both sides


after the wrapping, fold your Obi like this on the back side


take one of the Koshihimo, double it up and then put it over the folded part


now you have to tie the Koshihimo on the front side, one string through the loop ...


... make a ribbon


now slip the tyied Koshihimo behind the Obi layers


after all it has to look like this on the back side


now take the end part of your Obi ...


fold it like shown in the picture above, the end part behind the front part


and then you get this shape


next step: take your Obimakura and Obiage, put the Obiage over the Makura


now set the Obimakura under the folded layer,
then press the middle part together to get the bow shape ...

~*~

That was the first part. I am sorry for my bad English description, but I really hope you´ll understand what I mean and the pictures are kinda helpful.

The second part will follow soon =D


Hello dear readers!

A short while ago I tried to tie the Fukura suzume musubi because I want to wear my Furisode next month but it was too difficult for me ...


fukura suzume

Many people use a Biyousugata which makes tying such a difficult musubi much easier. Well I donnot have one yet ...

biyousugata
After all I decided to try the Tateya musubi. It´s a lot easier and in the end it worked out pretty well. I was very happy about that.

Tateya musubi can look like this:


... or like that:


© by Kurohaku

Because my try was not too bad I made a tutorial for you all. Unfortunately I have to split the whole thing because I took many pictures with my camera. Sorry for that in advance.

I also want to show you how to tie the Obiage and Obijime.
So please donnot miss the next following entries. ♥